Knowing CPR basics can make a life-saving difference when someone collapses unexpectedly. Indeed it is. Now imagine you’re at home, and a loved one suddenly collapses. Would you know what to do? Cardiopulmonary resuscitation (CPR) is a simple yet life-saving technique that everyone should be familiar with.
In emergencies like cardiac arrest, every second counts, and knowing how to perform basic CPR can mean the difference between life and death. However, many people hesitate because they are unsure of the correct steps or fear making a mistake.
Did you know that out-of-hospital cardiac arrests (OHCA) account for more than 356,000 cases annually in the U.S., with 73.4% occurring at home? This means that if someone collapses, it’s often up to a family member or friend to act quickly. That’s why understanding the basics of CPR is crucial.
In this article, we’ll guide you through the essential steps of CPR, so you can be prepared to help when it matters most.
What You Need to Know About CPR and How It Works
CPR, or Cardiopulmonary Resuscitation, is an emergency procedure that combines chest compressions with rescue breaths to help maintain blood flow and oxygen to the brain and other vital organs when someone’s heart stops beating.
Basically, CPR helps keep the body alive until professional medical help arrives. It is a simple yet effective way to buy time during critical situations, giving a person a better chance of survival.
For example, if someone suddenly collapses at a family gathering and stops breathing, following CPR guidelines can make all the difference. In such situations, you perform chest compressions and rescue breaths which can keep the blood circulating and helps prevent brain damage.
CPR is not meant only for doctors; it is a skill that every person can acquire, and knowing how to perform it can make the difference between life and death for someone else. But, how to perform basic CPR even without having a professional knowledge? We will certainly discuss that, but first it’s important to know when to perform CPR.
Identifying the Right Moments to Initiate CPR
In an emergency, it’s not always easy to know if CPR is needed. This is normal—fear and adrenaline can make it hard to think clearly.
But if you learn to spot the signs that someone needs CPR, you can act fast without second-guessing. For example, 70% of cardiac arrests occur at home, and 90% of these do not survive . Immediate CPR can double or triple a person’s chances of survival.
Here are the key signs to look for:
- Unresponsive: The person does not respond to verbal commands or physical touch, like shaking their shoulders.
- No Breathing or Abnormal Breathing: The person is not breathing at all or has irregular, shallow, or gasping breaths. These are signs of cardiac arrest.
- No Pulse: If trained, check for a pulse. If there is none, or you’re unsure, start CPR immediately.
Important Tip: Before starting CPR, ensure the scene is safe. Call emergency services right away, and if possible, ask someone nearby to get an Automated External Defibrillator (AED). Immediate action can significantly improve the person’s chances of survival until professional help arrives.
Key Guidelines to Remember for CPR Success
Performing CPR effectively can save a life, but it’s essential to follow specific guidelines to ensure safety and maximize the chances of survival. Here are the key elements to remember the basics of CPR:
1. Assess the Situation
The first step in CPR is to check if the person is responsive. Gently shake their shoulders and shout, asking if they’re okay. If they don’t respond, it’s crucial to act quickly.
Safety is important, so ensure the area around you is safe before approaching. Interestingly, about 30% of people who have performed CPR in real-life situations worry about making mistakes or causing complications.
Remember, even if you’re unsure, doing something is better than doing nothing. If the person is unresponsive, call for help and prepare to start CPR immediately.
2. Call for Emergency Help
You should perform CPR when someone shows signs of cardiac arrest, which means their heart has stopped beating. Look for signs like the person being unresponsive, not breathing, or only gasping for air.
For example, if you find a family member who suddenly collapses and doesn’t respond when you call their name, it’s a clear signal to start CPR. Remember, acting quickly is crucial. The sooner you begin CPR, the better their chances of survival.
Always call emergency services first to ensure professional help is on the way while you provide assistance.
3. Perform the ABCs of CPR
To effectively perform CPR, it’s crucial to understand the ABCs: Airway, Breathing, and Circulation. Here’s a simple breakdown of these key steps:
| Step | Description |
| A | Airway: Ensure the airway is clear by tilting the head back and lifting the chin. |
| B | Breathing: Check for normal breathing for no more than 10 seconds. |
| C | Circulation: If there’s no breathing or pulse, start chest compressions immediately. |
These steps are vital in the CPR process. Clearing the airway allows oxygen to reach the lungs, while checking for breathing confirms the need for immediate action.
If the person is not breathing or lacks a pulse, chest compressions will help circulate blood, providing essential oxygen to the brain and organs.
This CPR training guide can help you remember these critical actions during an emergency.
4. Stay Calm and Focused
Staying calm and focused is crucial when performing CPR. In real-life situations, 57% of people have felt stressed, and 27% have felt anxious while trying to help. These feelings are normal, but keeping your composure can help you think clearly and act effectively.
Take a deep breath to steady yourself, and remember the steps of CPR. Focus on the task at hand, and don’t rush. If possible, assign someone else to call emergency services, allowing you to concentrate fully on providing care.
Your calmness can make a significant difference in an emergency.
Now, let’s jump into the section of the procedure for performing CPR.
Step-by-Step Procedure for Performing CPR
CPR procedures change depending on the age of the person needing help and whether the person giving CPR has been trained.
- If you are formally trained in CPR, you can use rescue breaths along with chest compressions.
- If you haven’t been trained or don’t feel confident in your skills, hands-only CPR is the best option.
In this section, we will learn how to perform CPR for adults, children, and infants. However, procedures for these age categories are similar, but there are also some dissimilarities that one must know.
1. CPR for Adults
Here are the important steps for performing CPR on adults, outlined step-by-step:
Step 1: Open the Airway:
Before starting CPR, it’s crucial to open the airway to ensure that air can reach the lungs. This step helps prevent choking and allows you to check for breathing effectively.
To open the airway, use the head-tilt, chin-lift method. First, place one hand on the person’s forehead and gently tilt their head back.
With your other hand, lift their chin upward. This position clears the airway, making it easier to breathe. For example, if someone is unconscious after a fall, opening the airway can help you assess if they need rescue breaths.
Step 2: Check for Breathing:
After opening the airway, look, listen, and feel for signs of breathing for no more than 10 seconds.
Look for the chest rising and falling, listen for breathing sounds, and feel for breath on your cheek. If the person is breathing normally, stay with them until help arrives. However, if they are not breathing or only gasping, it’s time to start CPR immediately.
This quick assessment is crucial in determining the next steps in an emergency.
Step 3: Start Chest Compressions:
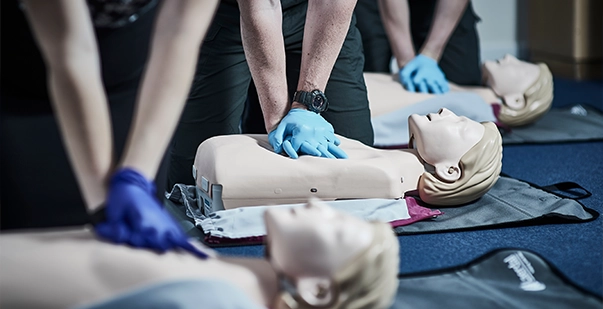
To begin chest compressions, place the heel of one hand in the center of the person’s chest and put your other hand on top, interlocking your fingers.
Keep your arms straight and press down hard and fast, pushing at least 2 inches deep.
Aim for a rate of 100 to 120 compressions per minute—this is about the same speed as the song “Stayin’ Alive.” Compressions help keep blood flowing to vital organs until emergency help arrives.
Step 4: Provide Rescue Breaths (Optional):
After giving 30 chest compressions, you can provide rescue breaths if you are trained. To do this, first pinch the person’s nose shut and seal your lips around their mouth.
Give a breath that lasts about one second, making sure the chest rises. Then, give a second breath in the same way. Each breath should be gentle but enough to fill the lungs. If you’re not trained, continue with chest compressions only.
Chest compression-only CPR is recommended for untrained bystanders to simplify the process and encourage more people to take action. However, for CPR Certification lay providers, rescue breaths are critical to performing high-quality CPR.
2. CPR for Children 1 to 8 Years
Here’s a concise steps for performing CPR on children aged 1 to 8 years, focusing on these important steps:
1. Check Responsiveness
The first step in CPR for children is to check if they are responsive. Gently tap the child’s shoulder and loudly ask, “Are you okay?” If they do not respond, it’s crucial to act quickly.
For example, if you find your child unresponsive while playing, make sure to check if they react to your voice or touch.
If there’s no response, immediately call for help or ask someone nearby to call emergency services.
2. Open the Airway
To open the airway of a child, first lay them flat on their back on a firm surface.
Gently tilt their head back by placing one hand on their forehead and using your other hand to lift their chin. This position helps clear the airway by lifting the tongue away from the back of the throat.
It’s important not to tilt the head too far back, especially in young children, to avoid blocking the airway. This simple step is crucial for effective CPR.
3. Check for Breathing
To check for breathing, look at the child’s chest to see if it rises and falls. Listen for any sounds of breathing, and feel for breath on your cheek.
Do this for no more than 10 seconds. If the child is not breathing or is only gasping, it’s important to act quickly. According to the World Health Organization (WHO), around 93% of the world’s children under the age of 15 years (approximately 1.8 billion children) breathe air that is so polluted it puts their health and development at serious risk. This highlights the importance of knowing how to respond in emergencies.
If they aren’t breathing normally, start CPR right away.
4. Start Chest Compressions
To perform chest compressions on a child, place the heel of one hand on the lower half of their breastbone. If the child is smaller, you can use two fingers instead.
Push down hard and fast, aiming for a depth of about 1.5 to 2 inches. Make sure to compress at a rate of 100 to 120 times per minute.
It’s important to let the chest rise fully between compressions to ensure blood circulation.
5. Give Rescue Breaths
After performing 30 chest compressions, it’s time to give 2 rescue breaths. First, pinch the child’s nose shut to keep air from escaping.
Then, seal your lips around their mouth and take a deep breath. Give a gentle breath that lasts about 1 second, watching for the child’s chest to rise. This shows that the air is going in. Repeat this for a second breath. Then, continue with more chest compressions.
Remember to keep the breaths gentle and controlled.
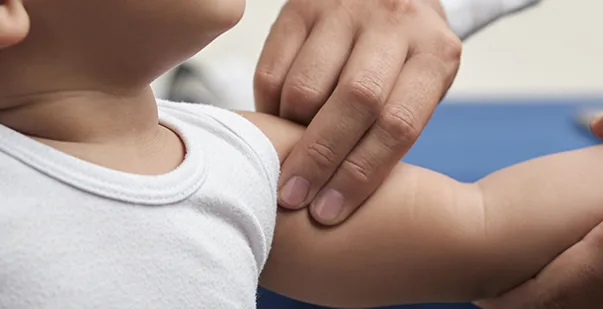
3. CPR for Infants
To check if an infant is responsive, gently flick the bottom of their foot. If the infant doesn’t respond and isn’t breathing or has no heartbeat, follow these steps:
- Place two fingers in the center of the infant’s chest.
- Press down firmly about 1.5 inches deep, at a rate of around 120 compressions per minute.
- If you know how to give rescue breaths, do chest compressions for 30 seconds, then give two rescue breaths. After that, do another round of chest compressions, and keep repeating this cycle. If you aren’t trained to give breaths, just continue with chest compressions.
Keep going until emergency help arrives or the infant starts to breathe again.
CPR Compression-to-Breath Ratio
Understanding the CPR compression-to-breath ratio is crucial for effectively performing CPR. The recommended ratio for adults and children is 30 compressions followed by 2 rescue breaths (30:2).
This means you perform 30 chest compressions at a steady rhythm before providing 2 breaths, allowing for the best circulation of blood and oxygen to vital organs during a cardiac arrest.
Compression-to-Breath Ratio for Different Age Groups:
| Age Group | Compression-to-Breath Ratio | Technique |
| Adults | 30:2 | Place hands on the center of the chest. Use your body weight to compress at least 2 inches deep and at a rate of 100-120 compressions per minute. |
| Children | 30:2 or 15:2 (if one rescuer) | Use one hand for compressions, ensuring the depth is about 2 inches. Maintain the same rhythm as adults. |
| Infants | 30:2 (if one rescuer) or 15:2 (if two rescuers) | Use two fingers for compressions, about 1.5 inches deep. Breaths should be given gently, covering the mouth and nose. |
If you’re not trained in providing rescue breaths, you can perform Hands-Only CPR. This involves doing continuous chest compressions without pauses for breaths. Focus solely on delivering compressions at a rate of 100-120 per minute.
Hands-Only CPR is effective in maintaining blood flow and can significantly increase the chances of survival until emergency services arrive.
Remember, any form of CPR is better than none.
Common Mistakes to Avoid During CPR
Knowing the right steps for CPR is essential because it helps you respond quickly and effectively in emergencies. However, many people make mistakes during CPR because they feel panicked, lack training, or have outdated information.
Fortunately, these mistakes can be fixed with proper CPR training and practice. Here are some common mistakes to avoid:
1. Not Calling for Help
In an emergency, every second is important. While your first instinct might be to start CPR right away, it’s crucial to follow the DRSABCD (Danger, Response, Send, Airway, Breathing, CPR, Defibrillation) action plan and call for help as soon as you notice someone is unconscious.
If you’re alone, performing CPR can be tiring, so it’s essential to get emergency services on the way as quickly as possible. You can continue doing CPR until the paramedics arrive to take over.
2. Keep Your Arms Straight
When giving chest compressions, make sure your arms are straight but not locked. This way, you can use your body weight to push down, which helps you last longer without getting tired.
You’ll need to keep going until help arrives.
3. Position Yourself Correctly
Your shoulders should be directly above the person’s chest when performing compressions. Don’t lean to one side; push straight down.
This helps squeeze the heart and lungs between the breastbone and the spine, keeping blood flowing.
4. Press Firmly
Make sure your compressions go down at least two inches. Many people worry about hurting the chest or ribs, but not pressing hard enough can be more harmful.
It’s rare for ribs to break, so focus on doing the compressions correctly.
5. Let the Chest Rise Fully
After each compression, don’t lean on the person. Let their chest go back to its normal position.
This is important for effective CPR. It can be tiring, but keeping your technique sharp helps a lot.
6. Maintain the Right Pace
Aim for about 100 compressions per minute. Going faster than 120 beats per minute doesn’t allow the heart enough time to refill with blood.
If you struggle to keep the beat, consider using a metronome app or listening to the song “Stayin’ Alive” by the Bee Gees, which has the right tempo.
Take Action and Learn CPR Today
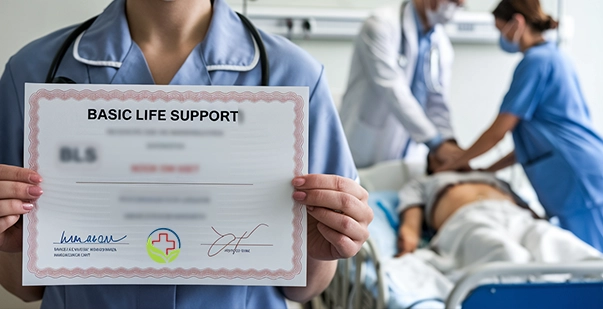
Everyone needs to learn the basics of CPR. Learning the basics can help save someone’s life when there is a case of cardiac arrest. It is always important to be ready to act, not just at home but in any situation. If you have to remember one thing, it is that performing CPR, even if poorly, makes the chances of survival greater until help arrives. There are a lot of reasons to consider getting a CPR certification; preparation is key to feeling confident in one’s skills. Many people can be motivated to learn the life-saving skill of CPR by raising their awareness. So power yourself and others because if someone knows CPR, that means the help is available.


