Through our website, we have mentioned CPR multiple times. If you are someone who reads our blogs often, we have discussed topics revolving around CPR many times. CPR means Cardiopulmonary resuscitation, and it’s a very crucial activity during emergencies. In emergencies, knowing how to perform CPR can make the difference between life and death. CPR is important because it helps maintain blood flow and oxygen to vital organs when someone’s heart stops beating.
Do you know that each year, around 436,000 Americans die from cardiac arrest? Yes, it’s a staggering number that surpasses deaths from colorectal cancer, breast cancer, prostate cancer, influenza, pneumonia, auto accidents, HIV, firearms, and house fires combined.
Knowing the importance of chest compressions is essential, as effective chest compression rate for adults is a very important factor in improving survival chances. You know why? properly executed compressions keep blood circulating and can greatly increase the likelihood of a positive outcome.
In this guide, we’ll cover everything you need to know about performing CPR. We’ll explain how to recognize when CPR is needed, show you the right techniques, and give you tips to ensure you provide the best help during a cardiac emergency.
What is Cardiopulmonary Resuscitation?
Cardiopulmonary Resuscitation (CPR) is an emergency procedure that combines chest compressions and rescue breaths to maintain circulatory flow and oxygenation during cardiac arrest.
When a person’s heart stops beating, CPR can double or even triple their chances of survival.
According to the reports, about 90% of people who suffer out-of-hospital cardiac arrests die, but performing immediate CPR can double or triple a victim’s chances of survival.
This underscores the crucial role of CPR in saving lives during cardiac emergencies.
Recognizing the Need for CPR
Recognizing the need for CPR is crucial in emergency situations, as timely intervention can save lives. Here are the key steps and signs to look for:
- Unresponsiveness: Check if the person is unresponsive by gently shaking them and asking loudly if they are okay. If there is no response, it’s a sign that immediate action may be needed.
- No Breathing or Abnormal Breathing: Look for normal breathing. If the person is not breathing at all or is only gasping, it’s an indication that CPR might be required. Agonal breathing, which is irregular and gasping, is not normal breathing and should be treated as a sign of cardiac arrest.
- Check Pulse: If you are trained to do so, check for a pulse. If there is no pulse or if you are unsure, begin CPR immediately.
- Heart Attack vs. Cardiac Arrest: Understand the difference between a heart attack and cardiac arrest. A heart attack occurs when blood flow to a part of the heart is blocked, whereas cardiac arrest happens when the heart malfunctions and stops beating unexpectedly. While a heart attack can lead to cardiac arrest, they are not the same. CPR is needed in cases of cardiac arrest.
Recognizing these signs and acting on them can significantly increase the chances of survival for someone experiencing cardiac arrest.
CPR is utmost important, but it is equally important to understand the CPR ratio in Infants, children, and adults. Let’s understand the chest compression rate for adults first.
Understanding Chest compression in Adults
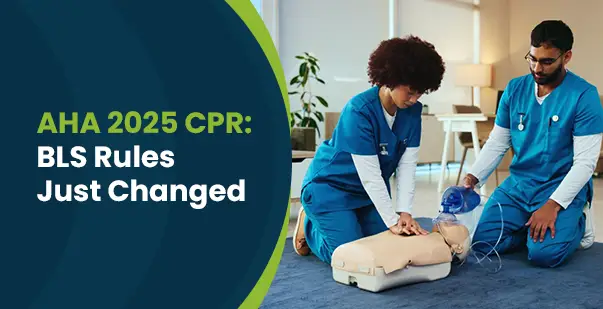
Chest compressions are a key part of Cardiopulmonary Resuscitation, an emergency procedure used when someone’s heart stops beating. They help get blood flowing to important organs. For adults, chest compressions should be done at a rate of 100 to 120 times per minute and to a depth of at least 2 inches (5 cm), but not more than 2.4 inches (6 cm). After each compression, let the chest return to its normal position.
There are two main types of CPR: conventional CPR and Hands-Only CPR. Conventional CPR involves chest compressions and mouth-to-mouth breathing in a 30:2 ratio (30 compressions and 2 breaths). Hands-Only CPR, which involves only chest compressions, is recommended for bystanders when a teen or adult suddenly collapses outside of a hospital.
Here are the steps to perform chest compressions in adults:
- Get Ready: Make the person lie flat on their back on a hard surface. Kneel next to them.
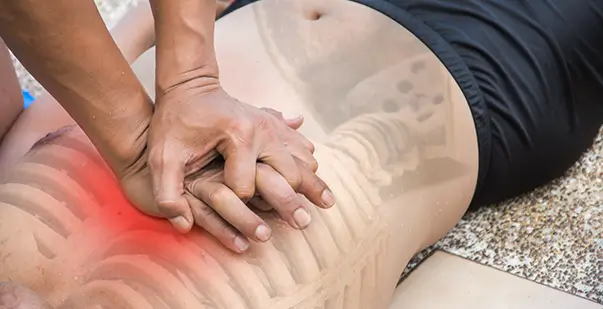
- Place Your Hands: Put one hand on the middle of the person’s chest, below the nipples. Put your other hand on top of the first hand.
- Straighten Your Body: Keep your body straight and your arms stiff. Your shoulders should be right above your hands.
- Push Down: Push down hard and fast on the person’s chest. Go about 2 inches deep and do this 100-120 times per minute.
- Let Chest Rise: After each push, let the chest come back up. But don’t take your hands off the chest.
- Give Breaths: If you can, give 2 breaths after every 30 pushes. If you can’t, just keep doing chest pushes.
- Keep Going: Keep doing this until help arrives. Use a defibrillator if one is available.
Remember, doing CPR right away can really help the person. It’s good to take a CPR Certification class to learn how to do it properly.
Chest Compression in Children
Chest compression in children above 1 year is a crucial part of cardiopulmonary resuscitation that can help in the event of a cardiac or breathing emergency.
For children aged 1 to puberty, chest compressions are performed using one or two hands, depending on the child’s size. The child is placed on their back on a firm, flat surface, and the heel of one hand (or both hands for larger children) is placed in the center of the child’s chest, just below the nipples.
The chest is then compressed hard and fast, about 2 inches deep, at a rate of 100 to 120 compressions per minute.
The chest should be allowed to return to its normal position after each compression. This is alternated with rescue breaths in a cycle of 30 compressions to 2 breaths
Chest Compression in Infant
Chest compression in infants (under 1 year) is a vital part of cardiopulmonary resuscitation (CPR) that can help in the event of a cardiac or breathing emergency.
To perform chest compressions on an infant, place two fingers on the center of the baby’s chest, just below the nipple line. Compress the chest to a depth of about 1 ½ inches at a rate of 100 to 120 per minute. Allow the chest to return to its normal position after each compression.
The compression to ventilation ratio in infant CPR refers to the number of chest compressions given compared to the number of rescue breaths. For a single rescuer performing infant CPR, the recommended ratio is 30 compressions to 2 breaths. This means delivering 30 chest compressions followed by 2 rescue breaths. This ratio is crucial as it ensures the infant’s body receives a balanced supply of oxygenated blood during the CPR process.
Tips for Performing Effective CPR
Let’s dive deeper into the steps involved in performing CPR. Timing and speed are crucial in CPR to help save someone during a heart attack, so it’s important to follow each step quickly and efficiently.
1. The first step of CPR is to call 911
Knowing how to perform CPR correctly can save lives in an emergency. It’s important to act fast and follow the right steps until help arrives. First, call 911 to alert medical personnel and get instructions on what to do next.
After calling 911, start giving CPR if needed. There are different techniques, so it’s important to use the right one to be effective. Remember, time is crucial in these situations. Stay calm and act quickly and safely.
2. Check the person’s breathing and pulse
Performing CPR can save lives. After checking if someone is unresponsive, the next step is to see if they have a pulse and are breathing. CPR involves two main actions: chest compressions and rescue breaths.
To do CPR correctly, start by checking if the person is breathing or has a pulse by feeling their neck. If they aren’t breathing or you can’t feel a pulse, begin CPR immediately. Knowing how to perform CPR is a crucial skill that can help save many lives.
3. Open the victim’s airway
To start CPR, first, make sure the person is lying flat on their back. If you think they might have a head or neck injury, be very careful when moving them.
With them lying flat, tilt their head back and gently lift their jaw. Also, check if there is anything blocking their airway.
4. Check for breathing
After you open the airway, check if the person is breathing. Place your ear near their mouth and listen for about ten seconds.
If you don’t hear or see any signs of breathing, start CPR right away. If the person is gasping for air, you should still begin CPR.
If the person is unresponsive but breathing normally, you don’t need to perform CPR. However, keep checking their breathing until help arrives.
5. 30 chest compressions
Now, you can begin CPR. Place one hand over the other and interlock your fingers. Position your hands in the center of the chest, just below the breastbone.
Keep your arms straight and use your whole body weight to press down firmly. Push at least two inches deep, and do this quickly at a rate of 100 to 120 compressions per minute.
Make sure to let the chest rise back up between each compression.
6. 2 rescue breaths
After doing chest compressions, start giving rescue breaths. To do this, tilt the person’s head back and lift their chin a little to open their airway. Pinch their nose shut, then cover their mouth with yours and give two breaths, watching their chest to see if it rises.
If the chest doesn’t rise, you may need to adjust their head position to open the airway better. Remember to use your body weight, not just your arms, when giving chest compressions.
However, it’s important to note that many experts say rescue breaths might not always be needed. Hands-only CPR, which involves only chest compressions, can be just as effective.
7. Repeat the cycle
Keep doing chest compressions and rescue breaths until professional medical help arrives. If someone else nearby knows CPR, take turns so you don’t get too tired. Keep going until medical assistance takes over.
Hands-Only vs. Traditional CPR
| Hands-Only CPR | Traditional CPR | |
| Description | A simplified form of CPR that focuses solely on chest compressions. | Combines chest compressions with rescue breaths, typically in a ratio of 30 compressions to two breaths. |
| Steps | 1. Call 911 if you see a teen or adult suddenly collapse. 2. Push hard and fast in the center of the chest to the beat of a familiar song that has 100 to 120 beats per minute. | Involves clearing the airway, tilting the head back, and ensuring that the chest rises with each breath. |
| Effectiveness | Has been shown to be as effective in the first few minutes as conventional CPR for cardiac arrest at home, at work or in public. | Traditional CPR, with its combination of chest compressions and rescue breaths, circulates oxygen throughout the body, which is essential for victims of cardiac arrest. |
| Recommended For | An excellent option for untrained bystanders who want to make a difference quickly. | Remains a crucial skill for healthcare professionals and those who are extensively trained in CPR. |
| Additional Information | People feel more confident performing Hands-Only CPR and are more likely to remember the correct rate when trained to the beat of a familiar song. | Using a sequence of chest compressions and rescue breaths helps move oxygen-rich blood to the brain. Doing this can prevent long-term neurological damage. |
Does Hands-Only CPR During Medical Emergencies?
While it might seem surprising, studies have shown that hands-only CPR can be more effective than traditional CPR in out-of-hospital emergencies. One notable study from the SOS-KANTO Study Group found that hands-only CPR often leads to better outcomes for the patient’s brain function.
In three randomized trials reviewed by researchers, 11.5% of sudden cardiac arrest (SCA) patients who received hands-only CPR survived until hospital discharge. In contrast, only 9.4% of patients who received traditional CPR (with breaths and compressions) survived to discharge. Other studies have found similar results.
Hands-only CPR is often more effective because:
- Bystanders feel more confident performing it.
- Mouth-to-mouth breaths are often not done well.
- Time is lost when trying to give mouth-to-mouth breaths.
These findings are significant. Multiple observational studies suggest that it’s better for an untrained person to perform hands-only CPR rather than attempt traditional CPR.
Learn CPR and Save Lives
Knowing CPR can make you a lifesaver. By learning the basics, you can help keep someone alive until emergency services arrive. Remember the key steps: check the scene, call for help, perform chest compressions, and provide rescue breaths if needed. Using an AED can also increase the chances of survival. Get trained and practice regularly to stay prepared. Your quick action in a cardiac emergency could save a life. Allow yourself and others with the knowledge of CPR – it’s a simple skill that has a powerful impact.


