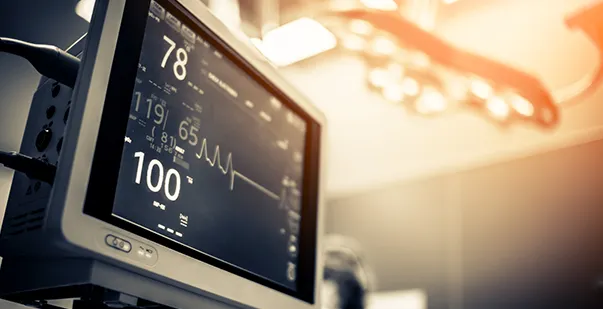
Capnography is a primary tool in the world of cardiopulmonary resuscitation, providing real-time feedback on the effectiveness of chest compressions and helping improve the health of patients. A study from 2021 showed that during CPR, low carbon dioxide levels (EtCO₂) below 10 mmHg are a bad sign and signify low survival chances. On the other hand, if the levels stay above 20 mmHg, there’s a much better chance of restarting the heart.
In life-saving situations, real-time feedback equips individuals to act fast and avoid mistakes. So whether you are in an emergency room or given CPR, instant updates matter. It keeps everyone focused and increases survival chances.
Capnography is one such machine that can provide real-time feedback and successfully guide rescuers by showing carbon dioxide (CO2) levels in the patient’s exhaled breath. These offer insightful data about blood flow and oxygen delivery during CPR. Learn how to use capnography in CPR.
What is Capnography?
Capnography measures the concentration of carbon dioxide in respiratory gas. It shows this graphically via the capnogram waveform and numerically via capnometry. This method is noninvasive and provides information on arterial blood carbon dioxide concentration. It differs from other methods of measuring carbon dioxide in the blood.
Other qualitative methods of detecting expired CO2 include pH-sensitive chemical indicators that change colors with different levels of CO2.
Capnography reflects how much carbon dioxide a person breathes out in real time. With the help of a small sensor placed in the breathing tube or mask, it measures CO2 with each breath. This creates a graph, also known as capnogram on a screen that updates continuously.
The graph shows:
- The shape of each breath – Tells how well air is moving in and out.
- End-Tidal CO2 (EtCO2) – The highest CO2 level at the end of breathing out.
- Breathing rate – Counts how many breaths a person takes per minute.
Why is Capnography useful in Sedation and Mechanical Ventilation?
Capnography is useful in sedation and mechanical ventilation as it helps in monitoring a patient’s breathing in real-time. Capnography successfully detects breathing problems and measures carbon dioxide in exhaled air. It shows helps detect breathing problems early by measuring carbon dioxide (CO2) in exhaled air. It shows the functioning of lungs in real time. Any sudden change in CO2 levels can detect blocked airways or slow breathing. Doctors can act timely before the situation worsens.
During sedation, patients can also breathe too slowly or even stop breathing. Capnography shows any changes in breathing by quickly measuring the carbon dioxide they exhale. In this way, doctors and nurses can easily spot problems and make effective adjustments.
In mechanical ventilation, capnography ensures that the ventilator is set well and offers the right amount of support. It also notifies healthcare providers of changes, if any, to ensure patient safety.
How to Set Up Capnography Equipment?
Setting up capnography is essential for accurate CO2. It helps monitor effectively during patient care. So choose the right device depending on the situation and the patient. Here are steps outlining capnography equipment setup:
- Select the Capnography Device
Decide whether you need a sidestream (attached to the mask or airway) or a mainstream device (directly measures CO₂ in the airway). For example, sidestream is often used for non-intubated patients, while mainstream is common in intubated cases. - Attach the sampling line
Connect the sampling line to the patient’s airway, either through a face mask, nasal cannula, or endotracheal tube. Make sure the connection is secure to avoid any air leaks, as these can impact CO₂ readings. - Connect to the Monitor
Plug the sampling line into the capnography monitor, ensuring it’s securely attached. Turn on the monitor and let it initialize. Most devices will automatically detect the sampling line. - Calibrate the Device
Run a calibration test if required by the device instructions, ensuring accurate CO₂ measurement. Some devices self-calibrate. Others, on the other hand, need a manual check, especially if they haven’t been used recently. - Check Baseline Readings
Verify that the device shows a baseline reading close to zero before starting patient monitoring. This step ensures the equipment is functioning correctly and is ready for accurate CO₂ tracking.
How to Use Capnography During CPR?
Capnography in emergency medicine measures carbon dioxide (CO2) levels in a patient’s exhaled breath. It offers valuable information about blood flow and chest compression quality. Use capnography during CPR to see if the efforts are effective and if any other adjustments are required. Keep reading to explore how to use capnography during emergencies:
Step 1: Set Up the Capnography Device
To start, connect the capnography device to the patient’s airway either through a mask or an endotracheal tube. Ensure that the device is properly calibrated so it can provide accurate readings. Once connected, the device will begin to measure CO2 levels with each exhalation. Check that the capnograph display is clear and that you can see real-time readings.
Step 2: Monitor CO2 Levels
During CPR, watch the CO2 levels on the screen closely. A CO₂ level around 10-20 mmHg generally indicates effective chest compressions and blood flow. If CO2 levels drop below this range, it might mean that compressions need improvement or that the blood flow isn’t sufficient. Higher CO2 levels can also suggest a return of spontaneous circulation, indicating a positive response to CPR.
Step 3: Adjust Chest Compressions Based on Readings
If the CO2 readings are low, consider adjusting the speed or depth of chest compressions. Proper compressions are crucial for pushing blood through the body, and capnography gives a clear signal if they’re effective. Maintain consistent compressions to help keep CO2 levels stable. This is a good indicator of quality CPR. Use the capnography feedback to keep improving your compressions as needed.
Step 4: Observe for Signs of Recovery
As CPR continues, look for a sudden rise in CO2 levels, which could mean the heart has started pumping again on its own. This increase is a positive sign and might signal that CPR can be paused to check for a pulse. If recovery signs appear, follow standard protocols to evaluate the patient’s status.
Step 5: Continue Monitoring Throughout CPR
Capnography should be monitored continuously, not just at the start or end of CPR. Consistent tracking helps identify trends in CO2 levels. This indicates whether the patient’s condition is improving or declining. This continuous feedback helps adjust efforts in real-time. By watching for any sudden dips or spikes, healthcare providers can adapt CPR as needed to maximize effectiveness.
Step 6: Use Capnography for Decision-Making in CPR Duration
Capnography can also help determine when to continue or stop CPR. If CO2 levels remain low and unchanging despite high-quality compressions, it may suggest a poor prognosis. This information can guide discussions among the team. This helps them make informed decisions. This data adds a scientific basis for CPR duration.
Step 7: Document CO₂ Readings for Post-Event Analysis
Lastly, it’s important to document CO₂ readings during CPR for post-event analysis. This record helps understand how effective CPR efforts were and provides valuable insights for future cases.
When Not to Rely Solely on Capnography?
As discussed in the blog, capnography is a great tool for monitoring breathing. However, it should not be the only thing that you must rely on. So look at the whole picture and check other signs to make the best decision.
1. Equipment Malfunction
If the sensor is not placed correctly, capnography may show inaccurate readings. This causes missed signs of breathing trouble. So check the equipment and confirm with other monitoring tools.
2. Low Blood Flow (Poor Perfusion)
During shock or cardiac arrest, low blood flow can cause low CO2 readings. This may not mean that the lungs are not working, but it means that the blood is not reaching properly. So look for other signs such as oxygen levels and pulse.
3. Airway Leaks or Disconnects
If in any case the breathing tube leaks or disconnects, capnography may show lower or flat readings. This does not mean that the patient is not breathing. So check the airway and listen for the breaths sounds.
4. Patient Movement
If the patient moves a lot, the sensor may shift, and cause incorrect readings. This can make it difficult to know if there is a real problem. So assess the patient well and adjust the sensor whenever needed.
How to Interpret the Normal Cardiogram?
Here’s a simpler explanation of the Capnography waveform interpretation:
Phase 1 (the blue line): This phase is known as the inspiratory baseline. It shows the air the patient breathes in, which has almost no CO2, resulting in a flat line. Since inhaled air doesn’t contain much CO2, there’s no change on the monitor during this phase. The alpha angle (the point where phase 2 meets phase 3) indicates the transition from airways to alveolar gas and is typically between 90-100 degrees in healthy patients.
Phase 2 (the pink line): This phase marks the start of exhalation. CO2 levels quickly rise as the air with CO2 moves out of the lungs. The CO₂ travels from the alveoli (where gas exchange happens) up through the bronchi and trachea (airways where no gas exchange occurs). The steepness of this line depends on how fast CO₂ is exhaled.
Phase 3 (the red line): This is the alveolar plateau, showing the later part of exhalation. In this phase, CO2-rich air from deep in the lungs (alveolar gas) reaches the monitor, creating a flat but slightly sloped line. The point where Phase 2 meets Phase 3 forms an angle, called the Alpha Angle, marking the transition from airways to alveoli. The end of Phase 3 gives the end-tidal CO₂ (ETCO₂) level, which is the highest CO₂ concentration exhaled. This number is what we see on the monitor, and it typically ranges from 35-45 mmHg.
Phase 4 (the yellow line), also called Phase 0: Here, CO2 levels drop sharply as the patient starts to inhale again, bringing in fresh air with very little CO2. This phase completes the cycle.
How can Capnography Help in Detecting Abnormalities?
Capnography waveform helps in detecting abnormalities in breathing and circulation. It shows changes in CO2. Here is how it can identify issues:
Low CO2 Levels: If the end-tidal CO2 (ETCO2) level is too low (below 35 mmHg), it can indicate hyperventilation (breathing too fast), reduced blood flow to the lungs, or poor chest compressions during CPR. If the value remains low despite improving CPR quality, it may suggest a poor prognosis, as the heart may not be responding to resuscitation efforts This may suggest conditions like shock or inadequate ventilation.
High CO₂ Levels: If ETCO₂ is too high (above 45 mmHg), it can mean hypoventilation (slow or shallow breathing) or issues like respiratory depression, where the body isn’t clearing CO₂ efficiently. This could be due to sedation, anesthesia, or airway obstruction.
Sudden CO₂ Drop: A rapid drop in CO₂ levels might signal a serious issue like a loss of blood flow, often seen in cardiac arrest. It can also indicate an airway disconnection or an equipment problem with mechanical ventilation.
Abnormal waveform shapes: Changes in the shape of the waveform can point to specific issues. For example, a “shark-fin” shape (slowly sloping Phase 2) may indicate airway obstruction, like in asthma or chronic obstructive pulmonary disease (COPD). A flat or absent waveform may mean the patient isn’t breathing or the airway is blocked.
Capnography for CPR Decision-Making and Enhanced Patient Care
Capnography in CPR provides real-time insights into a patient’s respiratory and circulatory status. The steps above ensure that they are receiving accurate CO2 readings that guide effective care. Capnography quickly detects breathing or circulation issues. If you consistently watch the waveform and CO2 levels, it can improve the health of patients. The use of clear feedback capnography makes it essential during critical situations. So start incorporating capnography into your routine and provide more responsive care for patients.
FAQs
What is capnography used for in CPR?
Capnography is used in CPR to measure the amount of carbon dioxide (CO₂) a patient exhales. With this equipment, medical professionals assess how effective chest compressions are during resuscitation. It helps you monitor CO₂ levels and check that blood is flowing properly and adjust their technique if needed.
What should EtCO₂ be during CPR?
During CPR, the End-Tidal CO₂ (EtCO₂) level should typically be between 10 and 20 mmHg. This range indicates that chest compressions are generating enough blood flow to the lungs. This range suggests that CPR is being performed effectively.
What does a PETCO₂ of 8 mean during CPR?
A PETCO₂ (Partial Pressure of End-Tidal CO₂) of 8 mmHg during CPR is considered low. It may indicate that chest compressions aren’t effective enough to circulate blood properly. This low value suggests that adjustments to the CPR technique might be necessary to improve blood flow.
When should capnography always be used?
Capnography should always be used when a patient is under sedation or receiving mechanical ventilation. It helps monitor their breathing and ensures they are ventilated properly. During CPR, capnography checks and assesses the patient’s condition and guides resuscitation efforts.
