Knowing the differences between adult and pediatric CPR is often a matter of discussion while learning CPR. But why is it important to know the differences? Well, this is because heart disease is still the leading cause of death in the United States.
Heart disease is taking a life every 33 seconds. In 2024, around 805,000 people are expected to have a heart attack, with 605,000 experiencing it for the first time. These alarming figures highlight the importance of knowing CPR (Cardiopulmonary Resuscitation). When a person’s heart stops, immediate CPR can mean the difference between life and death.
However, CPR isn’t a one-size-fits-all skill—adults and children require different techniques due to differences in their anatomy and body size. That’s why understanding how to perform age-appropriate CPR is crucial for everyone, from parents to teachers, and even bystanders.
This article will guide you through the key differences between adult and pediatric CPR, explaining how each method works and why adapting your approach based on the person’s age can significantly improve their chances of survival during an emergency.
Key Guidelines for Performing CPR Effectively
The primary objective of CPR (cardiopulmonary resuscitation) is blood circulation by maintaining oxygenated blood supply to the cells after the heart has stopped. In other words, this helps ensure that the crucial parts of the body, particularly the brain, continue to receive a steady supply of oxygenated blood until professional medical help is available.
Two main components are involved in the performance of CPR, cardiac chest compressions that effectively pumps blood through the heart, and normal rescue breaths that transfer air into the lungs.
For example, if someone suddenly falls down and stops breathing, a bystander can help by doing CPR. This means pressing hard and fast on the middle of their chest, about 100 to 120 times a minute, and giving rescue breaths after every 30 compressions. This can help keep the person’s organs working until an ambulance arrives.
Even when one is not trained, doing chest compressions can be very important because it keeps the blood flowing until help arrives.
Anatomical and Physiological Differences Between Adults and Children
Adults and children have distinct anatomical and physiological features, which is why CPR techniques differ for each.
Children have smaller, more delicate bodies, with softer and more flexible bones, especially in their rib cages. Their airways are narrower, which makes them more prone to obstruction, while their tongues are relatively larger in proportion to their mouths, which can also lead to breathing difficulties.
On top of that, children’s hearts are smaller and beat faster than adults, making their cardiovascular system more sensitive to issues related to oxygen supply.
Because of these differences, CPR for children requires gentler compressions, a more careful approach to airway management, and modifications to the ratio of compressions and breaths to ensure effective resuscitation without causing harm.
Now, let’s break down these differences in a table. So, here’s a table outlining the key anatomical and physiological differences between adults and children:
| Features | Adults | Children |
| Bone Structure | Stronger, harder bones | Softer, more flexible bones |
| Airway Size | Wider airway | Narrower, more easily obstructed |
| Heart Rate | Slower (60-100 beats per minute) | Faster (100-160 beats per minute) |
| Breathing Rate | Slower (12-20 breaths per minute) | Faster (20-30 breaths per minute) |
| Common Cause of Cardiac Arrest | Primarily cardiac issues | Often due to respiratory problems |
| Compression Force Needed | Higher force, deeper compressions | Gentler force, shallower compressions |
How to Perform Adult CPR Technique Effectively
Before we jump into the specifics of how CPR changes for kids, let’s start with the basics: adult CPR. After all, learning the right technique can boost an adult ‘s chain of survival and your confidence when stepping up to help in an emergency.
So, what exactly does it involve? It basically involves chest compressions and rescue breaths. Let’s break these down.
1. Chest Compressions
Chest compressions are the core part of CPR, as they help pump blood to the brain and vital organs when the heart stops. Here’s how to do them correctly:
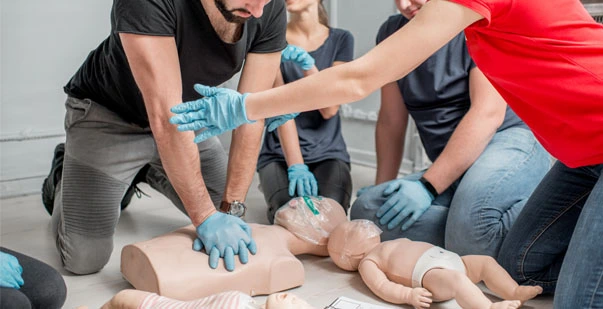
- Hand Position: Place the heel of one hand on the center of the chest, right on the breastbone (sternum), between the nipples. Put your other hand on top, interlocking your fingers. Keep your elbows straight, and position yourself so your shoulders are directly above your hands.
- Compression Depth: Push down hard and fast, aiming for at least 2 inches (5 cm) deep. Effective compressions require firm pressure, so don’t be afraid to use your body weight.
- Compression Rate: Maintain a rhythm of 100-120 compressions per minute. A good way to keep pace is to think of the song “Stayin’ Alive”—its beat matches the ideal rate for compressions.
Remember, After each compression, let the chest rise back to its normal position. This “full recoil” allows blood to flow back into the heart, ensuring effective circulation.
2. Rescue Breaths
Rescue breaths are a crucial part of CPR because they help provide oxygen to the person who isn’t breathing. Here’s how you do it:
- Technique: First, make sure the person’s airway is open. Tilt their head back slightly by lifting the chin and pressing down on the forehead. This helps clear the airway. Pinch their nose shut, then take a normal breath. Place your mouth completely over theirs to create a seal, and give a slow, steady breath lasting about 1 second. You should see the chest rise, which means the breath has gone in.
- Ratio: When performing CPR, follow the 30:2 rule — give 30 chest compressions, then provide 2 rescue breaths. Repeat this cycle until help arrives or the person starts breathing on their own.
Rescue breaths make sure that oxygen reaches the lungs, which can be vital in keeping the person’s brain and other organs alive during an emergency.
Be Prepared. Be CPR Certified.
Start your online CPR training today and learn life-saving skills.
Effective Pediatric CPR Technique for Emergency Situations
Now that you’re familiar with adult CPR, let’s switch gears and talk about CPR for children and infants.
Kids aren’t just smaller versions of adults—they have different needs and a more delicate structure. Knowing how to adjust your approach can make a big difference when every second counts.
So, let’s break down what you need to do when performing CPR on younger ones.
Note: In pediatric CPR, it’s important to adjust your technique based on the child’s age. Infants are considered babies under 1 year old, while children are those between 1 year and puberty. The approach changes because infants have much smaller bodies, softer bones, and delicate airways, requiring gentler compressions and breathing. Older children, though bigger, still need lighter pressure than adults.
Let’s discuss techniques here:
1. Chest Compressions for Infants
When performing CPR on an infant (under 1 year old), it’s important to use a gentler approach because their bodies are much smaller and more delicate than adults or older children.
- Hand Position: Place two fingers in the center of the infant’s chest, just below the line of the nipples. Make sure your fingers are positioned vertically to avoid pressing on the ribs.
- Compression Depth: Press down gently but firmly, aiming for about 1.5 inches (4 cm) deep. This may seem shallow, but it’s enough to pump the infant’s heart effectively without causing injury.
- Importance of Full Recoil: After each compression, let the chest rise back up completely. This ensures proper blood flow and allows the heart to refill between compressions. Avoid leaning on the chest, as this could prevent full chest recoil and reduce the effectiveness of CPR.
Being gentle yet precise can make all the difference in an emergency situation involving infants.
2. Chest Compressions for Children
When you perform CPR on children, it’s important to adjust your technique to fit their size and age. Here’s how to do chest compressions effectively:
- Hand Position: For younger children, you can use one hand to compress the chest. If the child is larger, you might need to use both hands, similar to how you would for adults. Place the heel of your hand in the center of the child’s chest, right on the breastbone.
- Compression Depth: Press down firmly, aiming for about 2 inches (5 cm) deep. This depth is crucial because it helps push blood out of the heart and into the body.
- Compression Rate: Keep a steady rhythm of 100-120 compressions per minute. You can think of the beat of the song “Stayin’ Alive” to help keep time.
- Importance of Full Recoil: After each compression, allow the chest to rise completely before pressing down again. This helps blood flow back into the heart, making each compression more effective.
Hence, using the right hand position, depth, and rate, can help you provide effective chest compressions that help maintain blood circulation until professional help arrives.
3. Rescue Breaths
Let’s get into the essential aspect of pediatric CPR that often gets overlooked: rescue breaths. These breaths are crucial for providing oxygen to someone whose heart has stopped beating, especially in pediatric cases. Here’s what you need to know about delivering effective rescue breaths.
For Infants:
- Covering Mouth and Nose: Use your mouth to cover both the infant’s mouth and nose completely. This ensures that the breath goes into their lungs without escaping.
- Technique: After ensuring the airway is clear by tilting the head back slightly and lifting the chin, take a deep breath and give a gentle puff into their mouth and nose. The breath should be just enough to make the chest rise visibly—this is key, as infants have smaller lungs.
- Breath Rate: Provide 2 rescue breaths after every 30 chest compressions. Each breath should last about 1 second.
For Children:
- Head Positioning: Similar to adults, tilt the child’s head back slightly to open the airway and lift their chin gently.
- Technique: Pinch the child’s nose shut and cover their mouth with yours. Again, deliver a breath that lasts about 1 second, ensuring the chest rises.
- Breath Rate: If you’re alone, give 2 rescue breaths after every 30 chest compressions. If you’re working with another rescuer, the ratio changes to 15 compressions followed by 2 breaths. You have to be precise with compression depth for the child.
Note: Always ensure the airway is clear before delivering breaths. The goal is to make the chest rise visibly with each breath; too much force can cause harm. It’s essential to perform the rescue breaths gently and efficiently, especially for infants, to avoid any risk of injury.
Key Differences Between Adult and Pediatric CPR
Now that you understand the techniques for both adult and pediatric CPR, it’s time to highlight the key differences between the two.
Recognizing these distinctions is essential because the right technique can dramatically impact the outcome during a critical situation.
Let’s find out what sets adult CPR apart from pediatric CPR so you can be fully prepared when it matters most.
| Adult CPR | Pediatric CPR | |
| Chest Compressions | Use two hands, placed in the center of the chest. | Use two fingers for infants; one or two hands for children, depending on size. |
| Compression Depth | At least 2 inches (5 cm) deep. | 1.5 inches (4 cm) for infants; 2 inches (5 cm) for children. |
| Compression Rate | 100-120 compressions per minute. | Same rate of 100-120 compressions per minute. |
| Rescue Breaths | Cover mouth completely, 30 compressions followed by 2 breaths. | For infants, cover both mouth and nose; for children, cover mouth only. Same ratio of 30:2 for solo rescuers, but 15:2 for two rescuers. |
| Checking Pulse | Carotid pulse on the neck. | Brachial pulse on the inner arm for infants; carotid pulse for children. |
| Causes of Cardiac Arrest | Often due to heart conditions. | More commonly due to respiratory issues (e.g., choking, drowning). |
| AED Usage | Use adult pads and settings. | Use pediatric pads if available; if not, adult pads can be used, placed appropriately. |
So, you have probably understood these key differences outlined above. So, for instance, while adults require two hands on the center of their chest for compressions, infants need two fingers in the same area.
Additionally, the compression depth for infants is shallower at 1.5 inches, whereas it’s 2 inches for children and adults.
Understanding these differences is essential, as applying the right technique can significantly improve the chances of survival in emergency situations.
Special Considerations in Pediatric CPR
Now that we’ve covered the basics of pediatric CPR, let’s take a closer look at some special considerations you should keep in mind. Kids can have unique situations that affect how you perform CPR, and being aware of these can help you respond effectively in an emergency. So, let’s discuss what makes pediatric CPR a bit different.
1. Causes of Cardiac Arrest in Children
Cardiac arrest in children is often caused by respiratory problems rather than heart issues like in adults. Common causes include choking, drowning, or severe asthma attacks, which can restrict airflow and lead to a lack of oxygen in the body.
According to the various reports, approximately 7,000 children experience cardiac arrest each year in the United States.
This statistic highlights the importance of knowing how to respond quickly and effectively to these situations, as timely CPR can make a significant difference in outcomes for young patients.
2. Importance of Rescue Breaths
The importance of rescue breaths in pediatric CPR cannot be overstated, as they play a crucial role in providing oxygen to a child’s body when their breathing has stopped.
Children often go into cardiac arrest due to a lack of oxygen, making it essential to restore airflow quickly. For example, if a child chokes on a toy and becomes unresponsive, performing rescue breaths after chest compressions can help deliver vital oxygen to their lungs.
This extra step can significantly improve their chances of survival and recovery, highlighting how every moment counts when dealing with emergencies involving children.
3. Airway Management
When performing CPR on children, proper airway management is crucial because their airways are smaller and more delicate than those of adults. To open the airway, gently tilt the child’s head back and lift the chin, but be careful not to tilt too far back, especially for infants, as this can block their airway.
For example, if you are performing CPR on a 2-year-old child, use just enough pressure to lift the chin without pushing too hard on the neck, as this can cause injury. It’s important to ensure that the airway remains clear throughout the rescue breaths.
A clear airway allows for effective breathing, which is vital when restoring oxygen to the child’s body during CPR.
| Age Group | Head Tilt Position | Key Consideration |
| Infants (0-1 year) | Neutral or slight tilt | Avoid tilting too far back to prevent airway blockage. |
| Toddlers (1-3 years) | Slight tilt | Ensure the chin is lifted gently to keep the airway open. |
| Children (4-12 years) | Moderate tilt | Confirm the airway is clear by checking for any obstructions. |
| Adolescents (13+ years) | Similar to adults | Follow standard adult guidelines for airway management. |
See how the head tilt position varies by age group and emphasizes the importance of managing the airway effectively during CPR.
4. Checking Pulse
Checking for a pulse is an important step to assess whether the heart is still beating. For infants, you can find the pulse by gently pressing your fingers on the inside of their upper arm, called the brachial pulse.
In a healthy baby, this pulse is usually felt just above the elbow and should be checked for about 5 to 10 seconds. If you can’t find it or if it’s weak or absent, you should start CPR right away.
For older children, you can check the carotid pulse by placing your fingers on the side of their neck, just below the jaw. Again, feel for the pulse for about 5 to 10 seconds. If it’s not there or you can’t detect it, that’s a sign that immediate CPR is needed.
For example, if a child is unresponsive and you check their carotid pulse and find it is absent, acting quickly can be crucial—since every minute without CPR can significantly reduce their chances of survival.
Automated External Defibrillator (AED) Usage
Learning to operate an Automated External Defibrillator (AED) is essential, especially during crisis events, since it enables a user to bring back a normal heart rhythm when time is of the essence. In this section, we will demonstrate how to use an AED device on both adults and children.
1. How to Use AEDs on Adults vs. Children:
When using an AED, the approach differs slightly for adults and children. For adults, use the standard settings on the AED and place one pad on the upper right chest and the other on the lower left side.
For children, use pediatric pads if available and follow the AED’s instructions. If pediatric pads are not available, you can still use adult pads, ensuring they don’t touch each other.
Always remember to follow the prompts given by the AED during use.
2. Placement of Pads
Placement of Pads is crucial for effective defibrillation. For adults, place one pad on the upper right side of the chest and the other on the lower left side. This creates a pathway for the shock to travel through the heart.
For infants or small children, if using pediatric pads, position them in the same areas, ensuring they don’t touch each other.
Always follow the AED’s instructions for correct pad placement to ensure the best chance of restoring a normal heart rhythm.
After this, you have to follow a few more important steps:
- Follow the AED Instructions: Once the pads are attached, turn on the AED. It will provide voice prompts and visual instructions. Follow these closely, and make sure to clear the area around the person before delivering a shock.
- Importance of Age-Specific Pads: Using the correct pads and settings is essential for maximizing the chances of a successful shock. Adult pads may deliver too much energy for a child, which can be harmful.
- Continue CPR: After the AED analyzes the heart rhythm and, if necessary, delivers a shock, continue CPR immediately. The AED may prompt you to resume compressions, ensuring blood flow to vital organs continues until emergency medical services arrive.
Having an AED readily available and knowing how to use it can significantly improve survival rates during cardiac emergencies. It’s a valuable tool in the lifesaving chain, and being familiar with its operation can empower anyone to step in and help when it matters most.
Learn CPR Techniques to Save Lives in Any Emergency Situation
It is very important to comprehend the different techniques and approaches for CPR so that lives can be saved at the time of crisis. For each age, different techniques have to be used, as they have some distinctive anatomic and physiological characteristics.
Possessing the correct knowledge and skills can enhance the outcome of a person suffering from cardiac arrest to a great extent. Everyone should be able to respond appropriately in case of an emergency, no matter if it’s an adult or a child since CPR training are done regularly.
Be updated, carry out the techniques and advocate for the techniques. Your desire to learn CPR is of utmost concern since it can be used at the right moment to save someone’s life.


